

intelli-CTi™ provides interactive guides, you can follow the interactive guide for the demo experience of the intelli-CTi here, or the complete experience here.
Installing the intelli-CTi™ Client Application
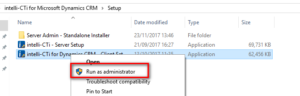
Go to install package then right-mouse click and run the client install as ‘Run as Administrator’.
Allow the installer to do the install by clicking [Next >] and [Install].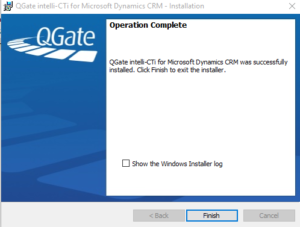
Configure intelli-CTi™ (Machine-level Settings)
Run “QGate Breeze Settings”, again as administrator.
Select the “QGate Integration Service for Dynamics CRM” and click [Configure…]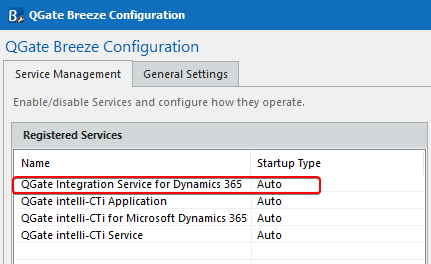
Select the CRM Client Integration you wish to use (e.g. Internet Explorer, Google Chrome, Outlook CRM or USD).
Then click on the ellipsis […] to create CRM Server Connection.
This is where you create the connection to the CRM system you wish to integrate with.
Click [Add]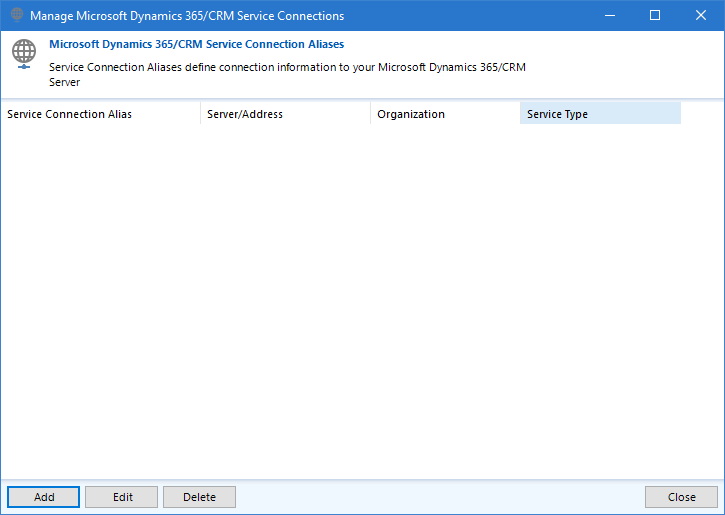
Enter an alias/name for this connection (something relating to this connection i.e. “UAT”).
Then complete the form answering which type of deployment type (the example below is for an online instance).
Select the Region where your CRM is located.
Then click on the ellipsis […] next to Organization, this will ask for your CRM credentials and, once confirmed, it will return all of the instances available to you.
Select the organization you want to use and [Test] the connection
(you should get a message back “Connection to Dynamics CRM Server was successful”).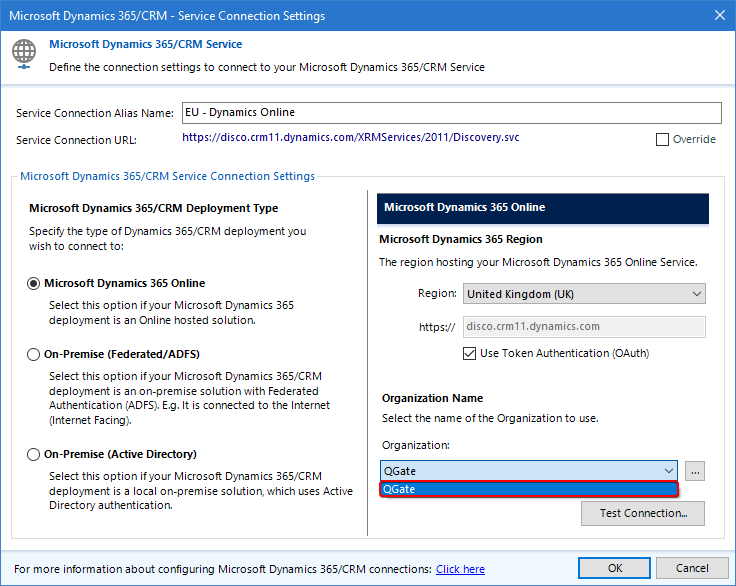
Clicking [Ok] will then add a connection to the listing and allow you to select this in the Microsoft Dynamics CRM Server Connection.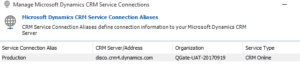
Select the newly-created CRM Server Connection.
For authentication, either use Default (for Windows/AD) or Specific Credentials (most common) test the connection.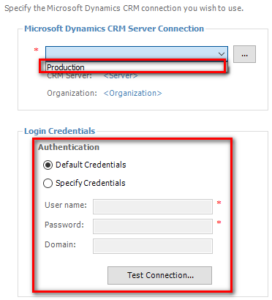
Finally (once you have a connection success) click [Save] the config.![]()
Now select the “QGate intelli-CTi Service” option and click [Configure…]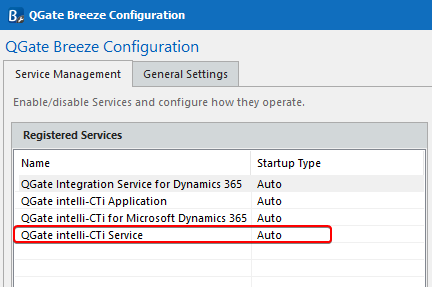
Now we are going to configure the connection to an existing intelli-CTi Service (either located within your network or cloud-hosted by QWARE).
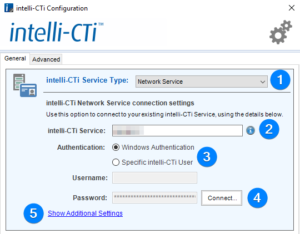
Network intelli-CTi Service
If you have an intelli-CTi Service installed within your network (e.g. to connect to an on-premises phone system), then first enter the name of the Server and click [Connect…] to test (using “Windows Authentication” in most cases).
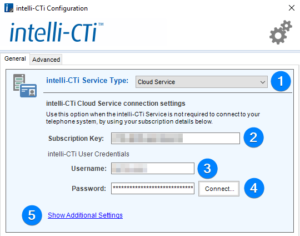
Cloud intelli-CTi Service
If you are using the cloud-hosted intelli-CTi Service (e.g. to connect to a cloud-hosted phone system), then choose that option from the drop-down.
Then enter your intelli-CTi Subscription Key and user credentials (set up by your intelli-CTi Administrator) and click [Connect…] to test.
This is the end of the machine-level configuration (i.e. settings which will affect all users)
Configure intelli-CTi (User-level Settings)
The first time Breeze/intelli-CTi is run for each standard user, the following will happen.
When you run Breeze for the first time as the local user you will get the following message(s)
(Note: the next two prompts may appear in different orders)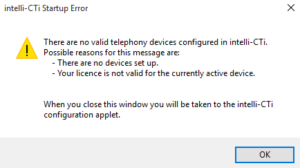
Click [OK] and it will take you to the Configure telephony connections screen
Click [Add], then select “intelli-CTi Telephony Server”, it will then ask you to configure the primary extension.
You will also be asked to confirm the client integration settings for this user, as well as which CRM connection and credentials to use.
Select the desired CRM Server Connection.
For authentication, either use Default (for Windows/AD) or Specific Credentials (most common) test the connection.
You should now have a completed install.
| Related Resources: | |
| Further Information: |